![Thomas' [insert something catchy] Blog](https://blogger.googleusercontent.com/img/a/AVvXsEhS8GpCgv6XrthlM6yk83QRMLhw3N-t-T7QC5e2xkElAyFOdKxrHBtlBm1JAcXwJ8yoREOLZIQVGzlBJYcGzbpN5MoJylSohJgXI2qWTeIuLfOupK48G8FVeH5FYa-orAALT8J3sBSWb75EiTS1xCi-ik4uhVgX9ouwjGw1KTmk2lPi258tyzaNU9vu=s800)
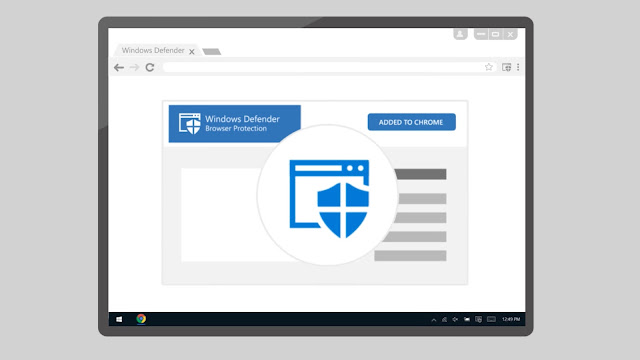
But old habits die hard in some organizations. Luckily, Microsoft does provide a nifty Defender Browser Protection Chrome extension that we can use as a compromise. It's essentially a substitute for SmartScreen for Edge but requires more manual configuration than simply enabling it via intune using e.g. the Edge Security Baseline.
But in order to use it, we need to ingest a policy template so head over to this resource to download it:
Set Chrome Browser policies on managed PCs - Google Chrome Enterprise Help

Working with Policy Templates
We've discussed how Intune has included ADMX-backed policies to manage even more settings on your Windows 10 devices. But what if you want to give settings that aren't part of Microsoft's "out of the box" policies? If you are familiar with Group Policies, you are aware that you can gain more policy settings by importing ADM and/or ADMX files. Microsoft Office, for example, contains an ADMX file, as do other third-party software such as Adobe Reader and, to a lesser extent, Mozilla Firefox. You can ingest ADMX templates geared for MDMs as well, albeit it is not as simple as it is with Group Policies. There is currently no mechanism to add additional ADMX templates with a just few mouse clicks, but it is possible with a little effort.
It sort of goes like this:
- We build a custom policy/ADMX
- We create a Policy CSP by ingesting the custom policy/ADMX
- We push the policies out
Easy! Right? Well, not always. Third party templates can sometimes be pretty tricky to figure out – even when they’re as fairly well documented as Google Chrome Policy CSPs.
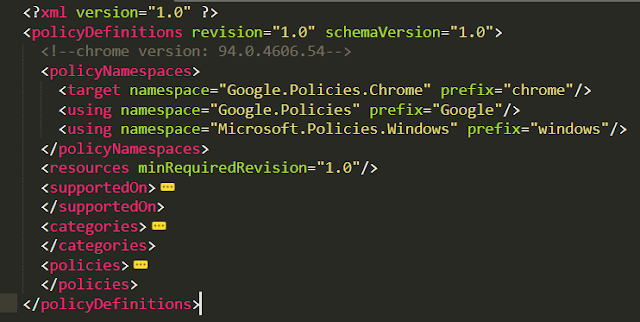
Chrome ADMX
To break it down:
./Vendor/MSFT/Policy/ConfigOperations/ADMXInstall/NameOfApplication/SettingType/ADMX.
Where NameOfApplication is the name of the application we’ll be targeting with our custom Policy; SettingType acting as a variable for the actual policy; and ADMX being the name of the ADMX file we’ll be using. It actually doesn’t matter much to Intune what you name them but for your sake (and definitely the sake of other poor techies), it’s advisable that you use names that makes sense and are easy to remember.
So for our Chrome.admx, it will look like this:
./Device/Vendor/MSFT/Policy/ConfigOperations/ADMXInstall/Chrome/Policy/ChromeAdmx
Time for Ingestion!
With both the Template and OMA-URI in hand, we’re ready to head off to Intune. So off you go then. Over to Intune > Devices > Configuration profiles > + Create profile > Templates > Custom

First thing we must do is ingest our Chrome ADMX. Copy and Paste Ingest the entire ADMX into the value field as a string.

Now that the ADMX template is in place, we need to define a policy from it that we want to use. Fill in the fields with the values we found from above.
As you can see in the screenshot below from another tenant of mine, there are a bunch that you can use. Refer to the Google Chrome Policy CSPs documentation for all of them.
But in our case, we’ll just be looking at a particular policy. One that Forces the installation of specific Extension.
We know need to collect all the relevant values needed to ingest the specific policies defined in the template. And the especially tricky part is figuring out the OMA-URI for the individual policies.

Forcing the Installation of a Chrome Extension
A custom CSP policy requires creating a Custom OMA-URI. Depending whether it is a device or user policy, the OMA-URI always starts with either:
./Device/Vendor/MSFT/Policy/Config/
./User/Vendor/MSFT/Policy/Config/
For this guide, I’ll be configuring a blocklist for Chrome extensions. So, is our policy user or device based? Find the BlockExternalExtensions (or whichever policy you’re interested in) in your ADMX file.
According to the policy class, it’s both! I prefer making my policies device based if I can so that’s what I’m going to define it as.
./Device/Vendor/MSFT/Policy/Config/

And we also know the name of the policy in question, so plug that in too
./Device/Vendor/MSFT/Policy/Config/???/ExtensionInstallForcelist

The next part we need to know is what category the policy belongs to.

OK so this policy references a parent. So find the parent name=”Extensions”. This, in turn, also references a parent category.

Putting it all together, our OMA-URI looks like this:
./Device/Vendor/MSFT/Policy/Config/Chrome~Policy~googlechrome~Extensions/ExtensionInstallForcelist

But what’s the data value? The element is defined as a list. That means the data value is a string.

If it were an integer, it would look like this:

But it’s not. It the data value is a string and strings can be a bit tricky sometimes. It’ll be easier to show you how to construct the string in Intune, so back to the custom profile.
We know that we need to enable the policy. We also know that the data id is “ExtensionInstallForcelistDesc”. But how does the policy know which extension we want to install? There you need to rely on Google’s documentation but long story short the syntax will look like this:
<enabled/> <data id="ExtensionInstallForcelistDesc" value="1bkbeeeffjjeopflfhgeknacdieedcoml;https://clients2.google.com/service/update2/crx"/>

The text in bold (highlighted in the screenshot) is the Chrome store identifier for the extension and that’s easy enough to find! Just search for the extension in the Chrome store. The identifier will be in the URL as shown in the screenshot below:

Pushing everything out
Before you finish creating the custom policies and assign it to the group with the devices you want to push it out to. Take note of the following so that you save yourself a headache from troubleshooting later:
- OMA-URI values are case sensitive.
- Also watch out for any trailing spaces which will cause the policy to fail due to not being able to find an OMA-URI path.
But when you are ready, you can follow the sync progress by navigating to the targeted device in Intune and clicking on Device configuration. And viewing the State.

Clicking on the policy will take you to the profile settings where you can see what policies have been pushed to the device. Also if any errors have occurred (e.g. the dreaded -2016281112 (Remediation failed)!), which is handy for troubleshooting.

But how does it look on the actual device? That’s our real aim, after all. And it looks good! The extension has been installed and the browser is set to managed.

Since this policy is managed, your users won’t be able to remove the extension.

And there you have it! That does it for this introduction to a very powerful tool available to you in Intune. It won’t always go smoothly, particularly if the vendors documentation is lacking (or completely non-existent) and you’ll find that a LOT of trial and error can be involved – similar to packing win32 apps and figuring out what the damn uninstall flags are. But that’s probably best saved for another day.
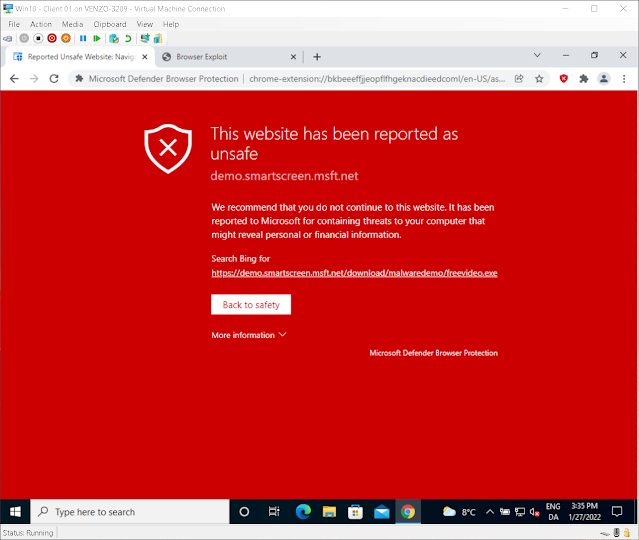
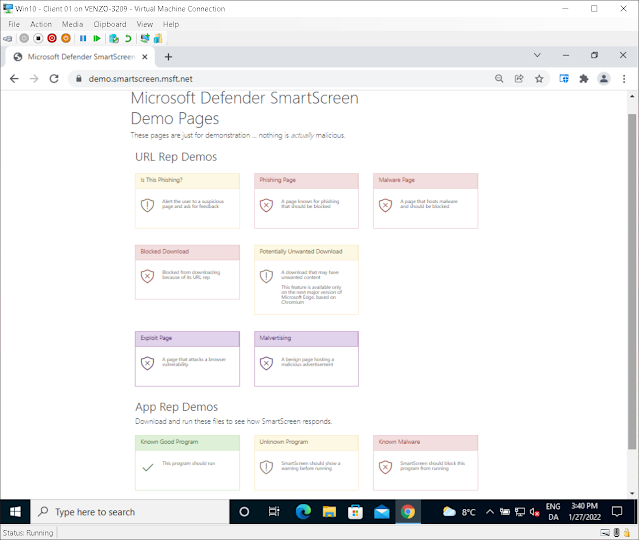
In order to test the extensions features, play around with what's offered here Microsoft Defender SmartScreen Demo (msft.net)
For example, the screenshot below demonstrates what happens when a protected browser attempts a downward from a URL with a bad reputation.