Following on two of my previous blog posts:
It's your boy!
So now we've got our payload. How do we use it?
We actually have multiple options. The first being installing Windows as a Virtual Machine - meaning that we'll be installing Windows within your operating system. Windows in Windows! There are a lot of reasons you might want to do this. Say you're still running Windows 10 and get curious about Windows 11 but are just not ready to commit.
I get you, I do.
But it's also super useful if you want to run up older versions of Windows for legacy reasons. Old DOS games; legacy software. As favor I once did for an old family friend had me spinning up a Windows 95 VM to get an antiquated propriety e-book to read off a floppy disk.
Not gonna lie. Kinda wish I'd spent that afternoon doing something else.
It's still useful to know how to do though!
The most practical aspect, however, by far, without doubt, notwithstanding, all the same, is just how damn easy it is to have a homelab these days!
So let's build this bad-boy Hyper-V VM!
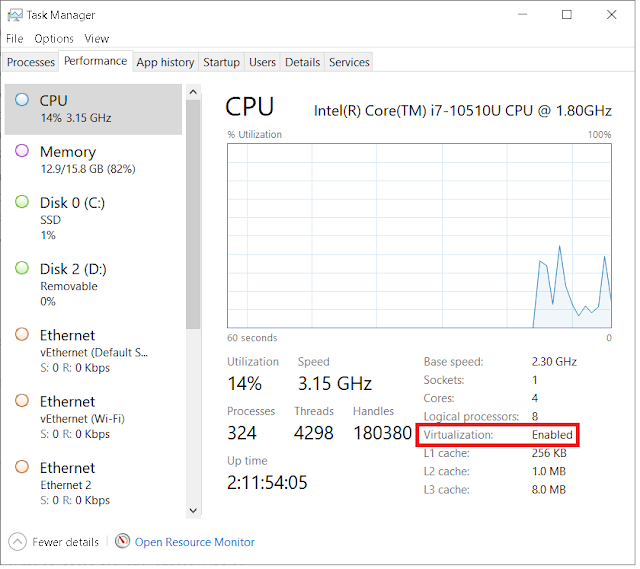
First thing you have to do is make sure your hardware can even run virtualized environments!
The easiest way to see if your hardware supports virtualization technology is to open up Task Manager and see if Virtualization is Enabled:
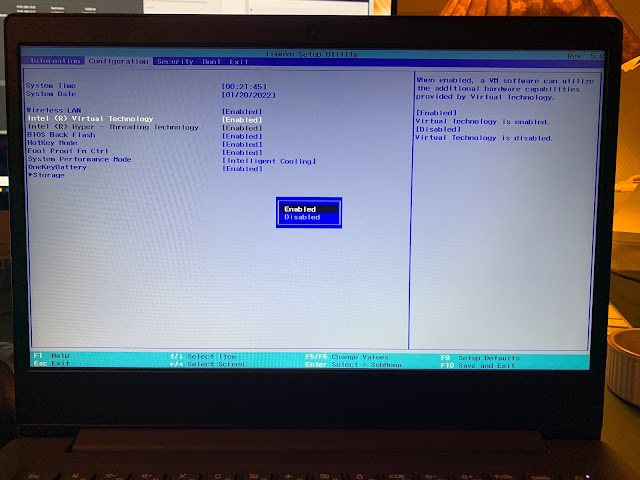
If it says disabled, you might need to get into the BIOS and how you do that will depend on your hardware.
- Lenovo tends to require spamming the F1 key 5-10 times on startup. Maybe F2. Who knows!?
- HP prefers spamming F10 to open the BIOS Setup Utility. Sometimes ESC.
- Dell devices dictates spamming the F2 key at the Dell logo screen during startup.
- Don't forget that some laptops have a fn lock - so you might also have to try holding that down while spamming ALL of the above!
- If all else fails, including throwing chicken bones around in a voodoo inspired circle, I find spamming F10 + F12 tends to cheese the startup menu (but seriously, just google "bios [your device]").
Assuming you've successfully gotten into your devices' BIOS without rage smashing it first (well done!), you're now faced with the fact that pretty much every vendor not only has a different BOIS UI but that this UI will most likely differ amongst different models offered by the same vendor!
As much as I am an Apple fanboy (they make good products, even if they're arguably overpriced. I also wouldn't mind having a Rolex. Fight me.) within the PC world I'm almost as big a Lenovo fanboy. That said, HP does win when it comes to the "prettiest" BIOS UIs.
Of which I'm not going to post a screenshot of because I can't be bothered to hook up the HP mini I use as a home ADDS and instead will post this camera photo of a Lenovo test machine I convinced work to buy me.
Seriously. I'll always go Lenovo if given the choice. Despite the fake heritage from buying the ThinkPad series, they just make good products.
ANYWAY!
You'll be looking for something akin to Intel (R) Virtual Technology. Or VTX. Or anything even slightly resembling "Virtua-". This is what you want to enable.
Now that the hardware side is taken care of... time to handle the software side!
Second thing you have to do is to make sure that the Hyper-V feature is enabled in Windows.
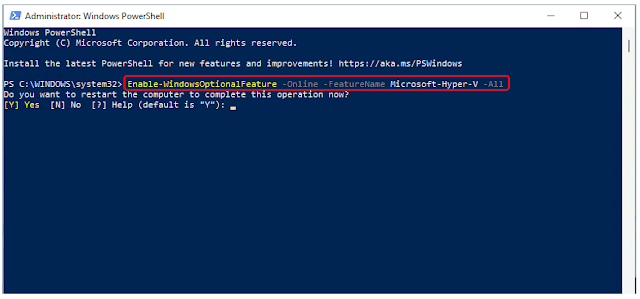
So open up an elevated powershell, and run:
Enable-WindowsOptionalFeature -Online -FeatureName Microsoft-Hyper-V -All
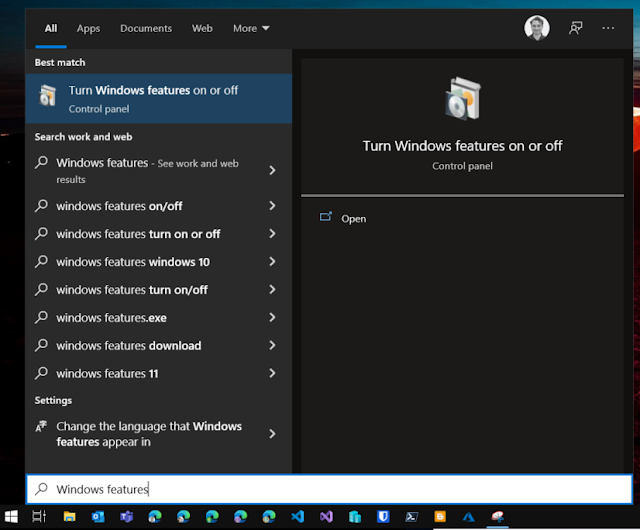
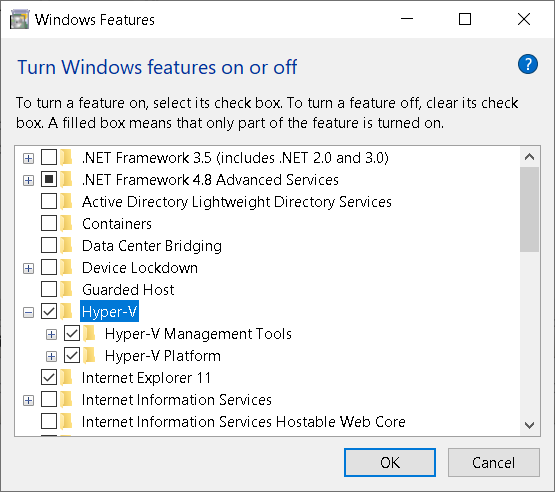
OR you can do things the GUI way. So start by searching for "Turn Windows features on or off".
Put a checkmark next to "
Hyper-V" ensuring that at least Hyper-V Platform is selected.
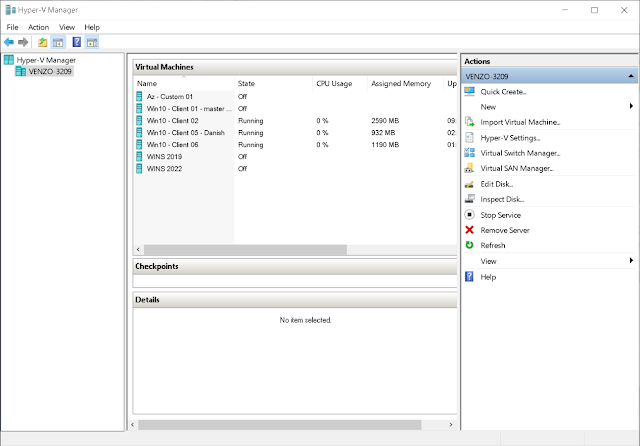
Reboot and you should not be able to find the Hyper-V Manager in the Start Menu.
Click "
New" in the menu on the right...
Select Generation 2. The only reason you'd choose Generation 1 would be if you were installing a non-Windows NT based OS
OR if you wanted to make a VHD image that you can upload to Azure.
The default Startup memory value is 1024 MB. We'll be bumping that up to 2048 because anything less is... well, is shite. Anything more is redundant for a Windows 10 installation.
The reason is because we'll also be keeping the default setting for Use Dynamic Memeory for this Virtual Machine. What this means is that 2048MB will be the default statup memory (i.e. the memory the VM assumes it always has available) whereas Dyanmic Memory means that the VM will draw upon however much available virtual memory the host machine (i.e. the device you're running the VM on) has to offer if needed.
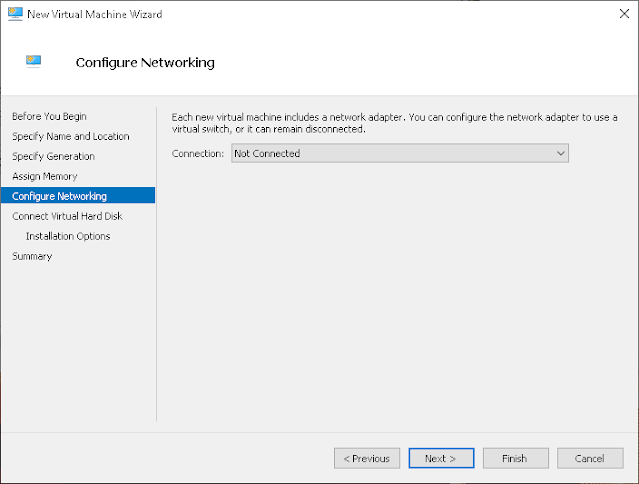
This splash specifies the virtualized NIC (network interface card) your VM will use as a network connection. If you've never used Hyper-V before, there should only be one option:
From the dropdown menu, select Default Switch.
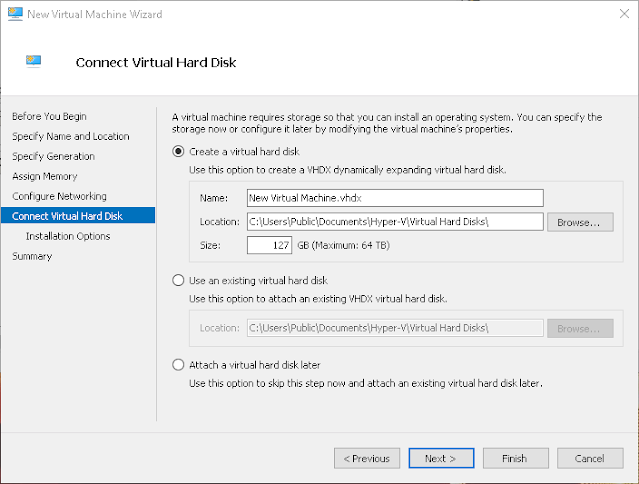
Next step is to attach a virtual hard disk (VHD). If you selected Generation 2 from one of the previous steps, the extension will be VHDX. Just like word documents are either .doc or .docx - Microsoft loves denoting *x* as the "next big thing!".
Don't pay too much attention to the size. Even though 127 GB may seem a bit overkill, VHDXs are dynamically expanding. This means that 127 GB is reserved for the virtual hard disk. So if your installation caps at 85GB, only 85GB will be used on the host machine. Conversely, 127 GB is a hard limit reserve so your VHDX can't exceed that without you expanding the virtual drive.
This is possible but let's put a pin in that for now.
Now that we have prepared the container for our VM, it's time to
fill'er'up! Select the appropriate ISO file (see either
this post for a direct download or
this post to use the MediaCreationTool)
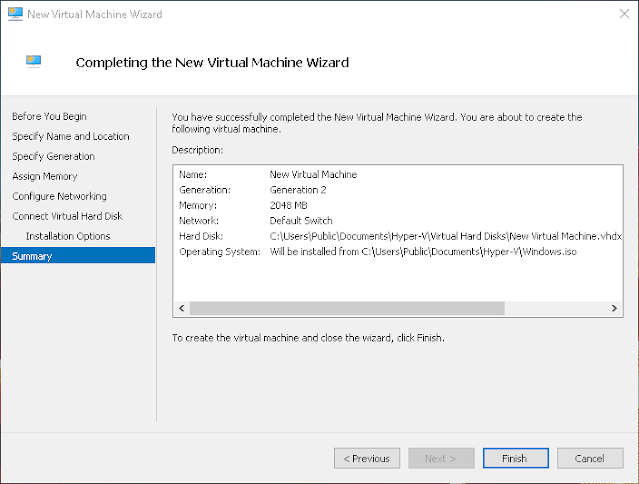
And confirm the configuration settings are correct before clicking
Finish.
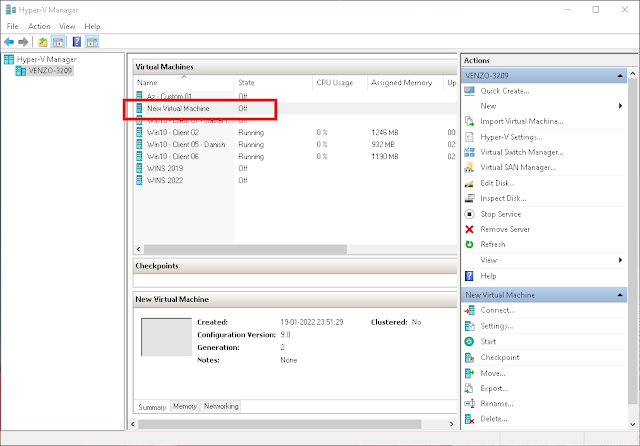
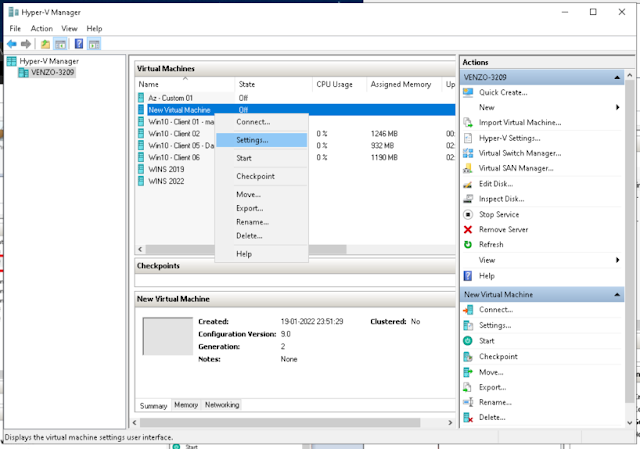
Your new Virtual Machine should appear in the list!
We're almost ready to spin her up! But first, right click on the new VM and select Settings...
We just want to go to the Security tab and set a checkmark next to Enable Trusted Platform Module. This is technically optional but highly recommended as it both betters overall security hardening of your VM with minimal impact while simultaneously reflecting an actual hardware based device more accurately.
Trust me. I work in the business and although most of my clients have donor devices for testing some... don't. I had to jump through a few loops to get my current company to buy me a test device and... VMs will never replace an actual device when it comes to testing endpoints.
The Actual Installation Process
Aka the actual Meat and Potatoes.
Regardless if you're going the VM or bare metal route, the following steps will be the same. The screenshots below are all made using Hyper-V but really, it will (should!) look exactly the same.
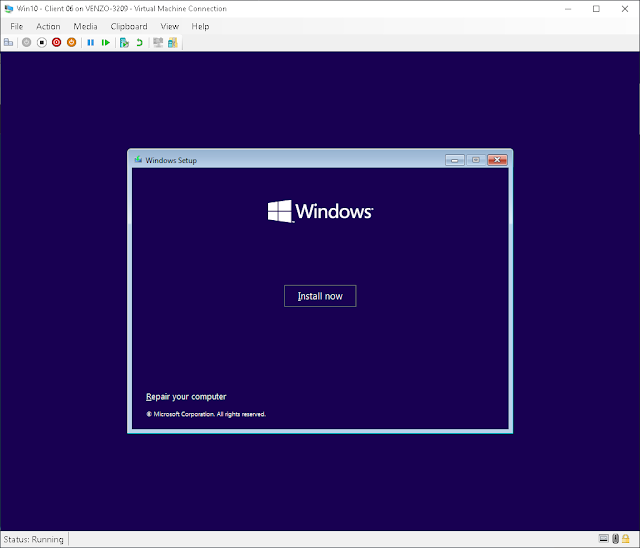
Click on... you guessed it... Install now.
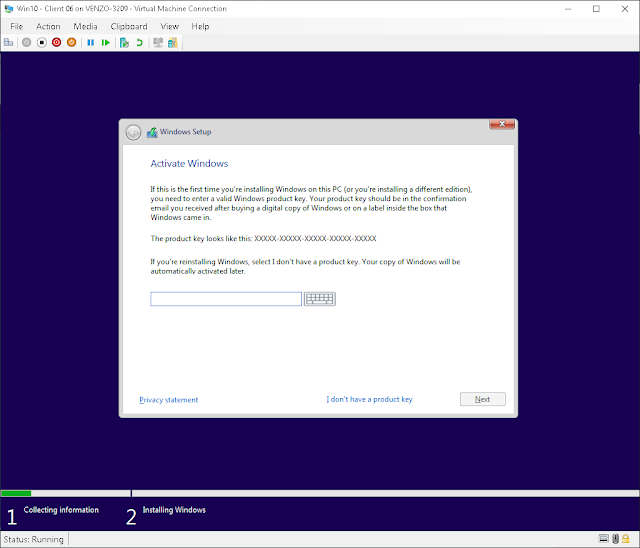
Enter in a serial number. Or don't! Microsoft is pretty generous when it comes to unlicensed grace periods and even after you've gone past all you're missing out on is being able to change your wallpaper background and other UI customizations.
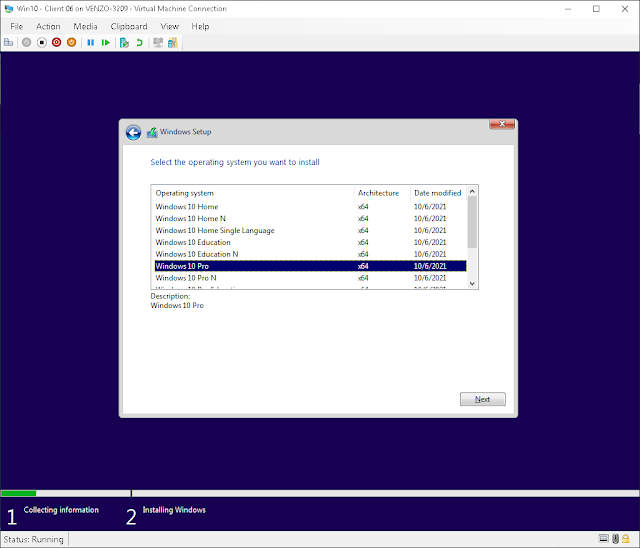
Select what version Windows you want. As if there is anything worth choosing other than Windows 10 Pro 🙄
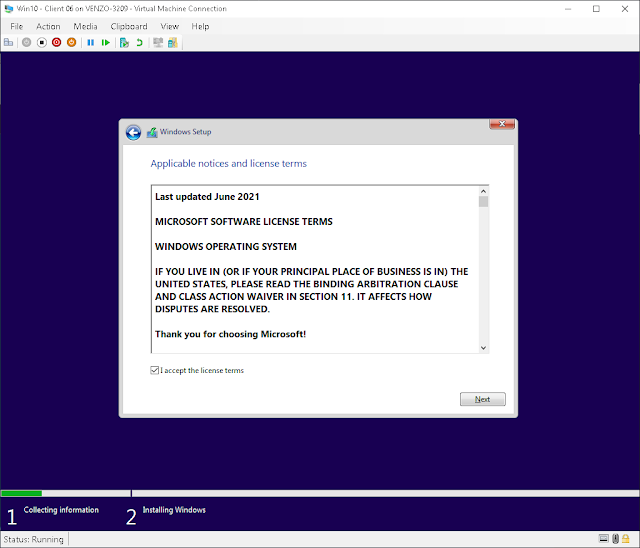
Accept the license! Although if this was an Intune job, you could automatically skip this part on behalf of your users! Check out one of my other blog posts for details.
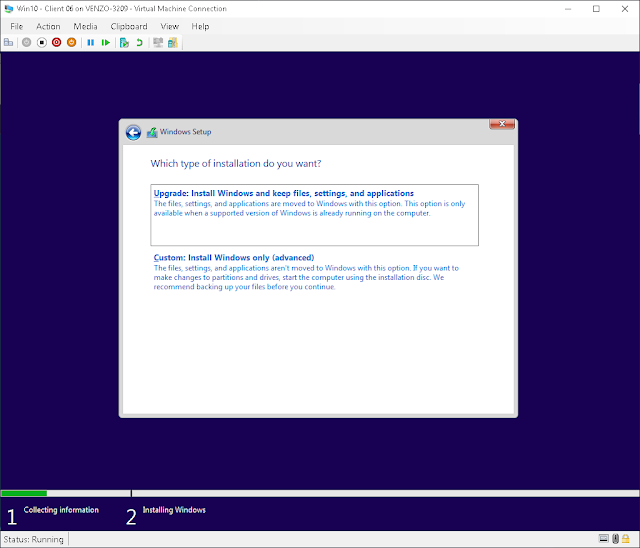
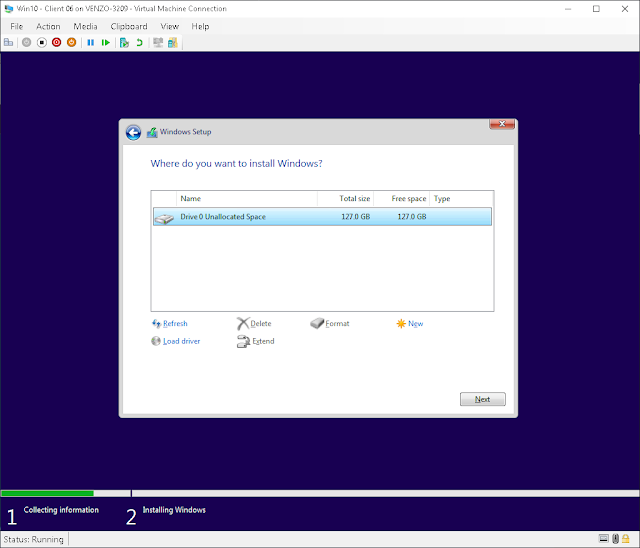
Always select Custom: Install Windows only (advanced). If you're doing a new install, you don't want anything left on the disk. If you're doing a full re-install, there's probably a reason why. So you don't want anything left on the disk.
Delete ALL THE THINGS!
Recovery partitions on desktops are for losers anyway, since losers don't take advantage of cloud drives and local backups. Right? 😝
So the only issue is the actual OS. Which isn't a problem especially since you now know how to grab AND install the latest and greatest Windows releases!
If you encounter an error e.g. "cannot find license" or whatever, just reset the VM and try again. It happens all the time.
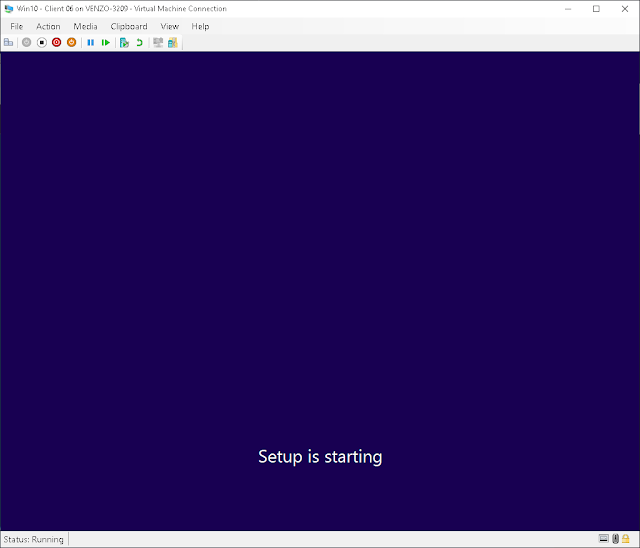
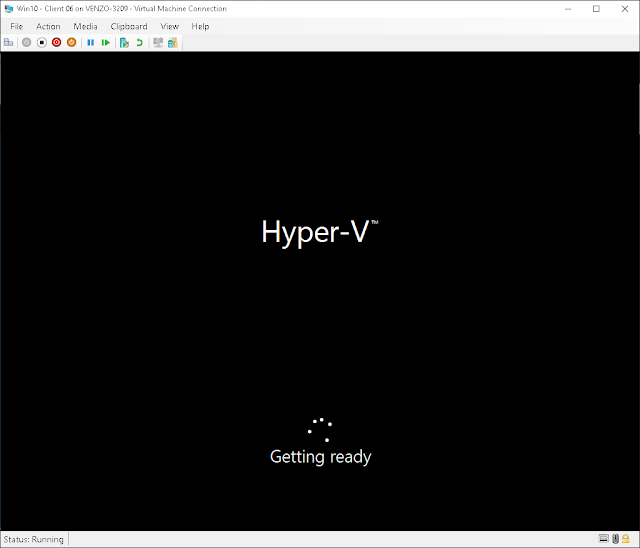
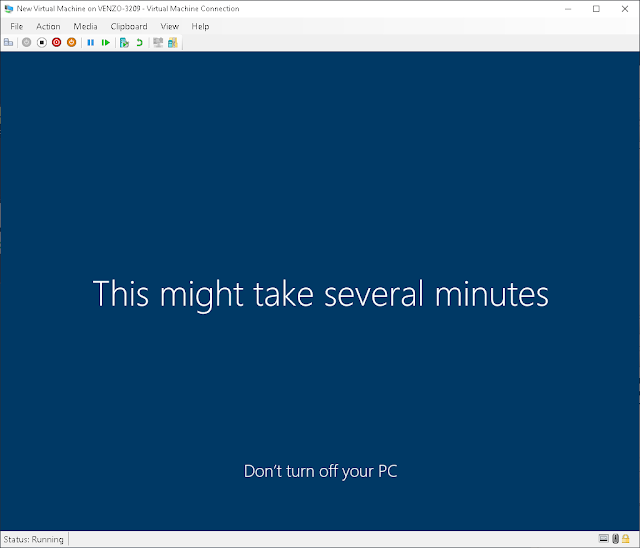
Next screenshot: Obligatory status splash.
Obligatory "black screen" splash.
Obligatory blue "Just a moment..." splash.
Now we've gotten to the OOBE (Out-Of-Box-Experience) screen. Since this is a fresh install (and not an Intune deployment) all of the bells and whistles are available to the user.
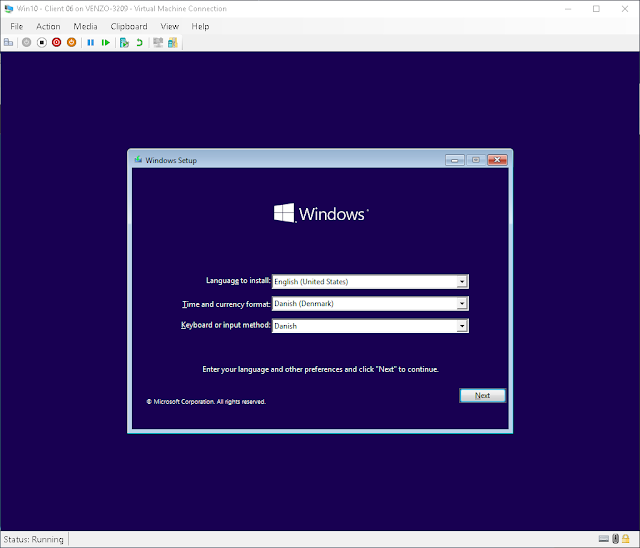
First off is the region. Seeing as I live in Denmark, I'll select Denmark as the region.
Is this right? You're damn right, it's right.
And seeing as I still live in Denmark, I probably have a Danish keyboard. So I should probably select that option.
Do I want to add a second keyboard layout? Nah fam, I'm good. Next.
Since I was asked so politely, I'll wait a moment.
Uh-oh. Windows has some very important stuff to do. Better give it some space.
Another moment? This moment is lasting a minute.
Obligatory black "I just rebooted myself!" splash.
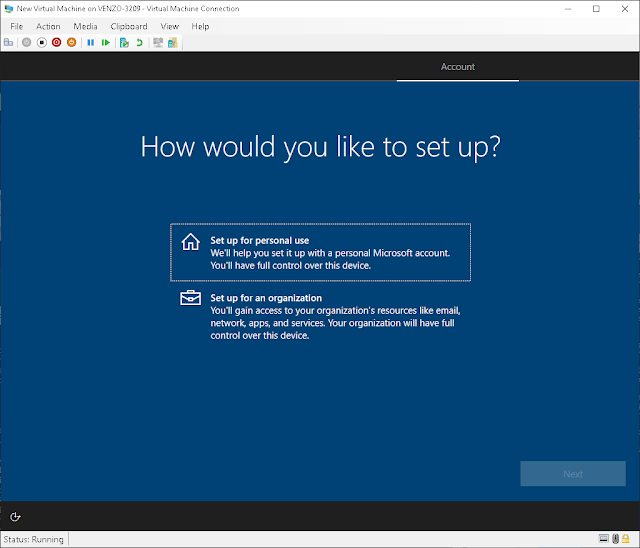
And here's the money shot! If you're reading this guide, then most likely you'll be selecting Set up for personal use. This is assuming that you're aware of the need for either an Azure AD or Active Directory domain in order to utilize the Set up for an organization option.
The latter option is covered in some of my other posts; particularly if you look for the posts containing the autopilot, MDM, Intune, On-Prem., etc. labels.
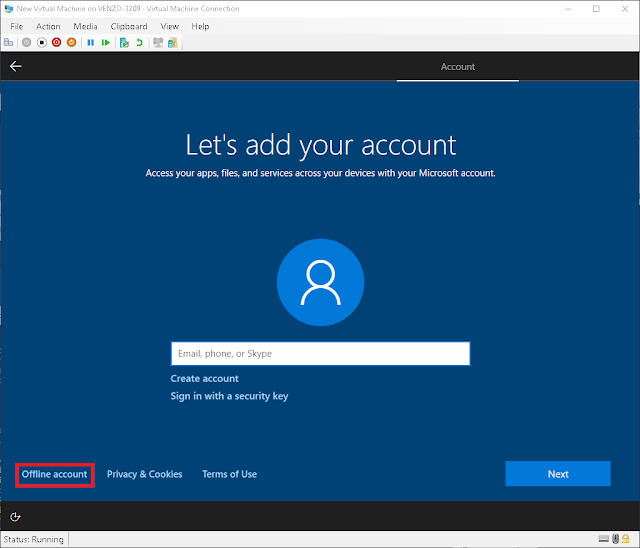
You can either choose to use an already registered Microsoft account or create an Offline account. Again, assuming the target audience of this particular blog post, I'm going to assume that you're either a complete novice user or someone just looking for a quick'n'dirty test VM.
So we'll be choosing the Offline account option.
DO NOT TEMPT ME, MICROSOFT! YOUR SIREN OF TEMPTATION WITH SWEET WHISPERS OF AN ONLINE CLOUD EXPERIENCE SHALL NOT SWAY ME!
NOT TODAY, GOOD SIR.
NOT TODAY.
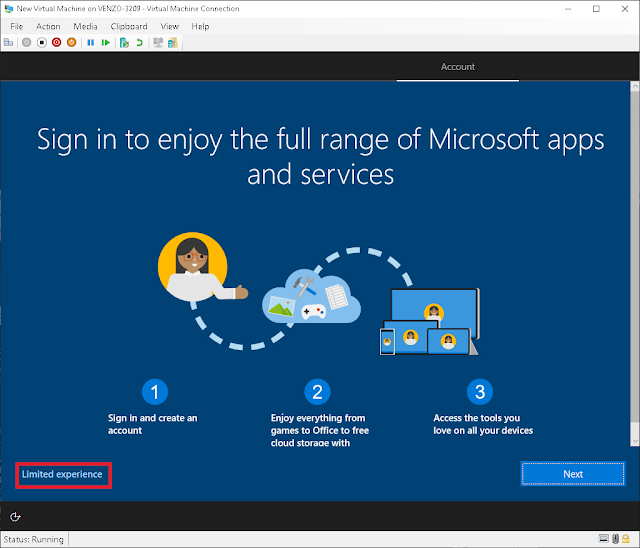
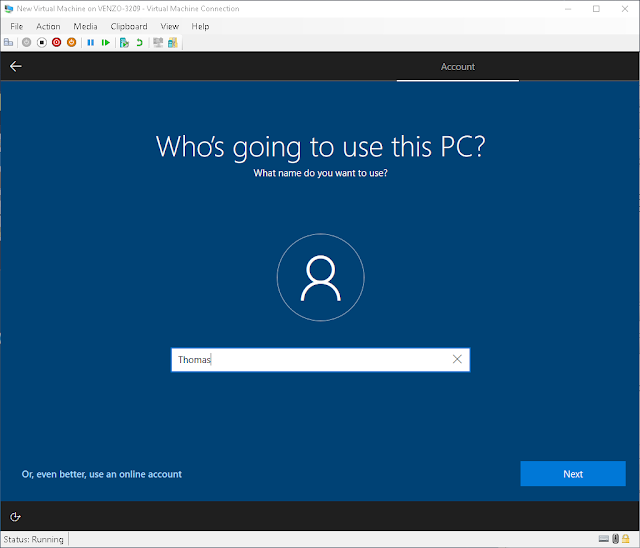
So if you still decide to just make a local account, then once you get to this screen - select the Limited experience option in the lower left-hand corner.
Choose a username for your local account:
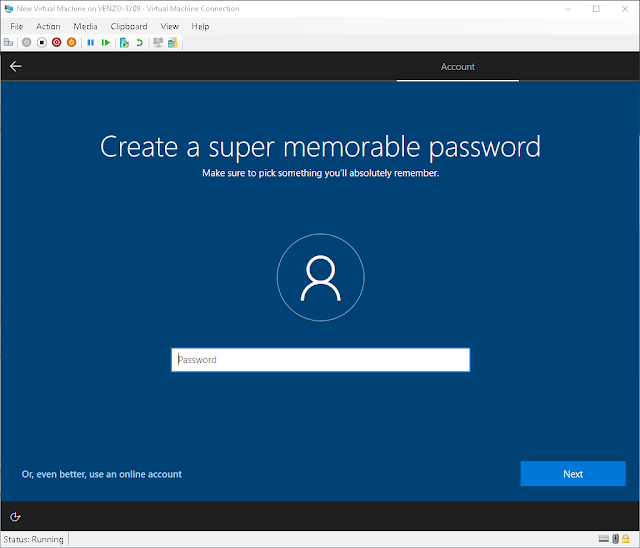
And a super duper memorable password:
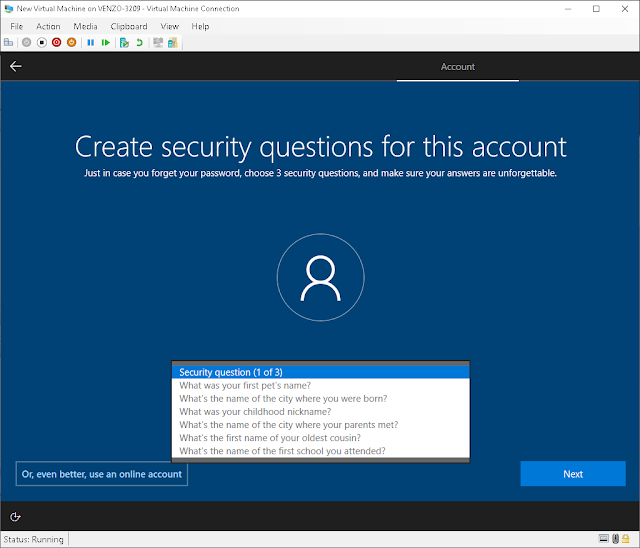
Plus *sigh* three security questions from the same pool of security questions Yahoo! used in the 90s 😩 Not that it matters. Firstly I don't use local accounts (at least not set up this way) on any actual production/work devices and, even if I did, I wouldn't use answers that a standard 12 year old on 4chan could probably dox me with.
Acceptacceptaceeptwhateveracceptsureacceptwhateveraccept
Even more Annoyware! Well, I'm an important businessman with lots of important business to do. So I choose "Business" instead of just skipping.
To be perfectly honest, I'm not even sure what this does!
Hej med dig!
You don't say!
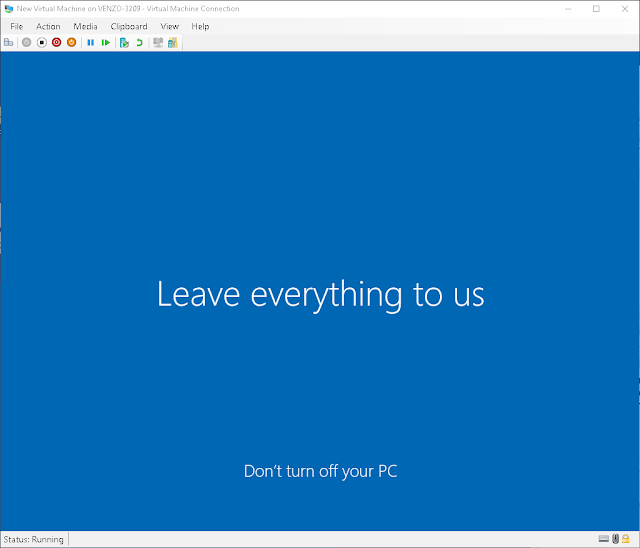
Mhm. I can't help but have an immediate distrust towards anyone (or anything) that says "Leave everything to us".
In this case, it all turned up Milhouse!
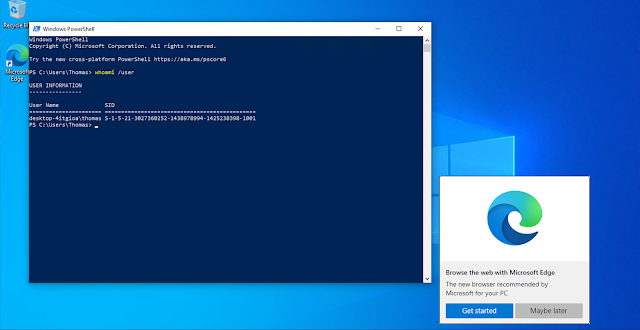
And there you have it. You've successfully downloaded Windows; slapped it on some sort of installation media; initiated the installation process; and manage to get all the way through to the desktop! Well done!
Guess you don't have to resort to a ramen based diet by buying a new macbook nor go prematurely grey by switching to Linux after all!
![Thomas' [insert something catchy] Blog](https://blogger.googleusercontent.com/img/a/AVvXsEhS8GpCgv6XrthlM6yk83QRMLhw3N-t-T7QC5e2xkElAyFOdKxrHBtlBm1JAcXwJ8yoREOLZIQVGzlBJYcGzbpN5MoJylSohJgXI2qWTeIuLfOupK48G8FVeH5FYa-orAALT8J3sBSWb75EiTS1xCi-ik4uhVgX9ouwjGw1KTmk2lPi258tyzaNU9vu=s800)