How to set up a NAT network with subnets in Hyper-V
Today we're looking at how to get Hyper-V VMs talking to each other. If you're coming from my quick 'n dirty homelab guides about setting up and Domain Joining the Windows 10 and Windows Server VMs you set up in Hyper-V, this is the next step.
I'm not going to show you the right way first. I'm going to show you what I did when I was first messing around with homelabing years ago, because I (personally) learn just as much from seeing how not to do things.

The problem
We need our Win10 client to reach the Domain Controller at WINS2022.lab.int. The DC also hosts DNS for the lab.int domain (in part due to my laziness), so we only need to worry about one IP.
But here's the thing: if you're running Hyper-V's Default Switch, it auto-assigns subnets to your VMs and you can't change them. It picks a different range whenever it feels like it. So even if both VMs share the same virtual NIC, they can end up on completely different subnets.
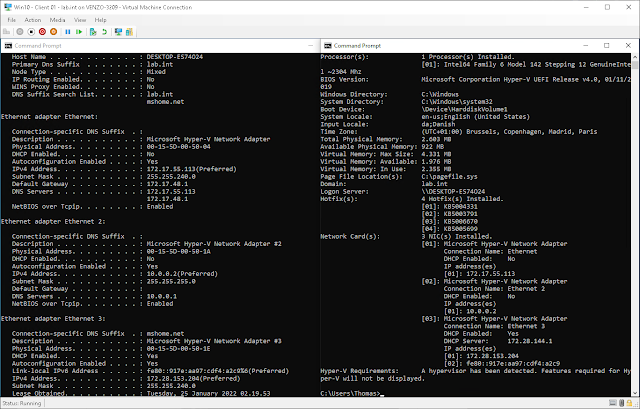
Run ipconfig /all on the Win10 client:
Win10 client is sitting on 172.28.144.1. Check the Domain Controller:

DC is at 172.17.55.113. Different subnet entirely. 172.28.x vs 172.17.x. These two can't see each other.
Let's try pinging anyway. One thing to keep in mind: Windows blocks incoming ping (ICMP echo) by default. If you need to enable it later, look for File and Printer Sharing (Echo Request - ICMPv4-In) in Windows Firewall. That's not our problem right now though.

Different subnets, no route between them. That's why nothing came back.
The fix
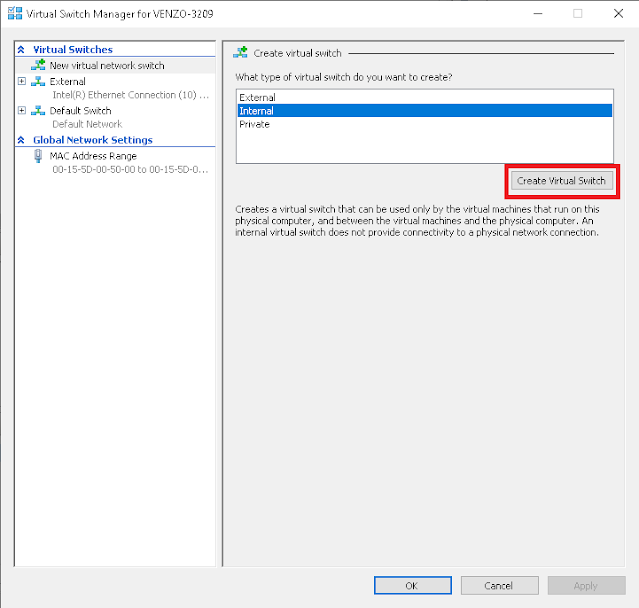
We need both VMs on the same subnet. The Default Switch won't let us control that, so we're going to make our own switch.
Quick aside on switch types, because I wasted time picking the wrong one the first time around. There are three: Internal lets VMs talk to each other and to the host, but they can't reach the internet. Private is VMs only, the host can't even see them. And External bridges to your physical NIC, so the VMs are on your real network. I picked External first thinking that's what I wanted, but it exposed my lab VMs to my home network, which wasn't great. Internal is what we want.
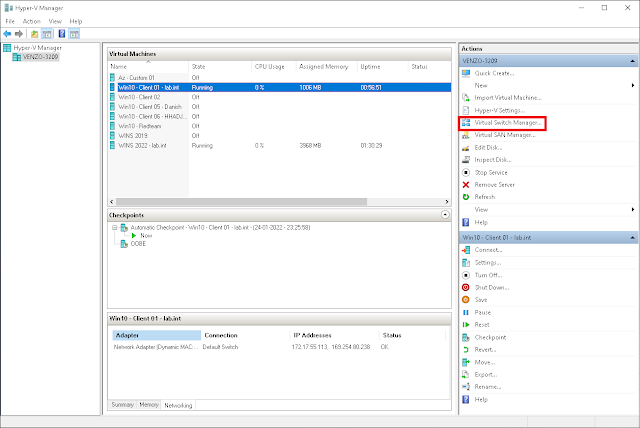
Open Virtual Switch Manager in Hyper-V Manager:
Select Internal > Create Virtual Switch.
Go to your host machine (the actual PC running Hyper-V, not a VM) and run ncpa.cpl. You'll see a new network adapter for the switch you just created. Give it a static IP on whatever subnet you want your VMs on. Leave the gateway and DNS fields blank; the host resolves DNS through its physical adapter, not this one.

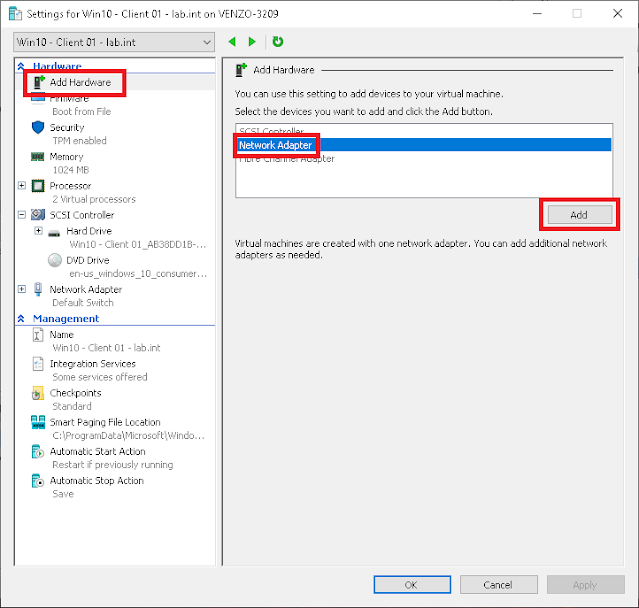
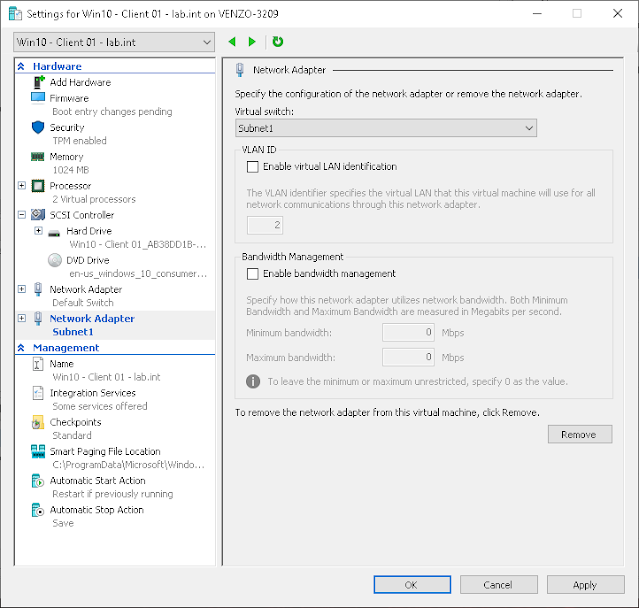
Now boot into each VM and run ncpa.cpl to assign static IPs on the same subnet.
On the Domain Controller, I'm giving it 10.0.0.1 with a 255.255.255.0 subnet mask. Since the DC also runs DNS, it points to itself:

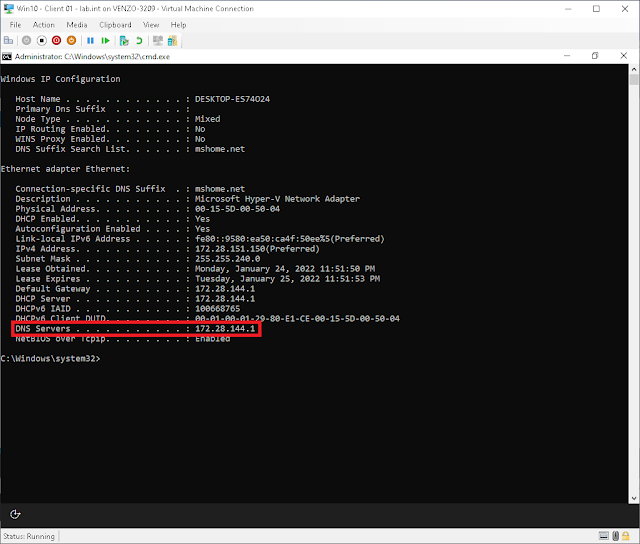
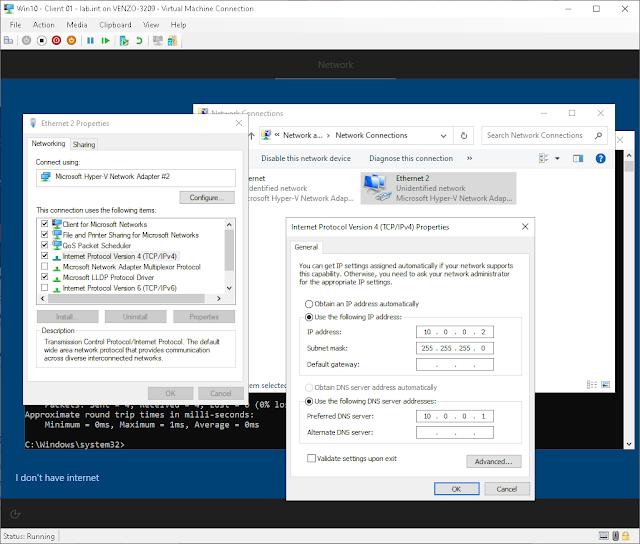
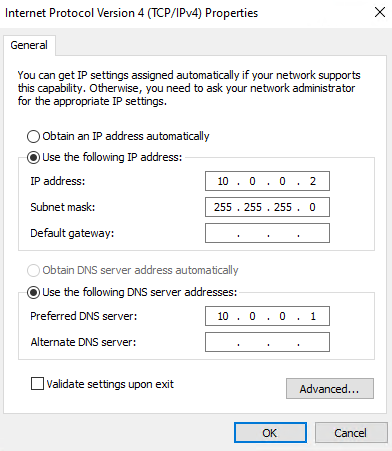
On the Win10 client, I'm assigning 10.0.0.2 with the same subnet mask. Set the Preferred DNS server to the DC's IP (10.0.0.1) so name resolution for lab.int works:
And there it is. Client can ping the DC.
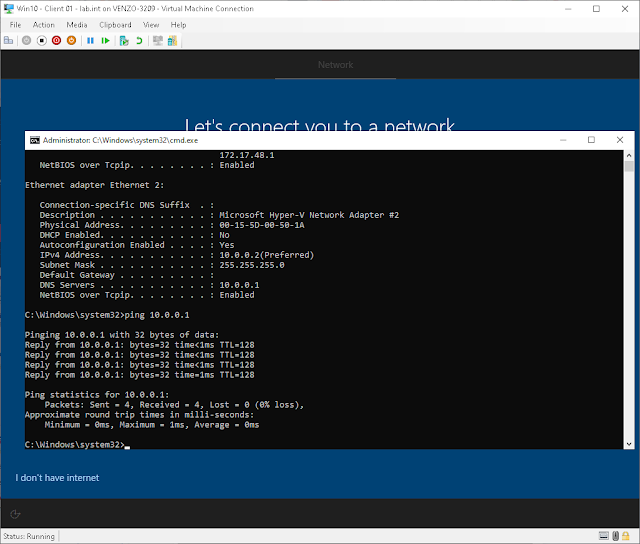
Here's the full IP configuration on the client for reference. Static IP on the 10.0.0.x subnet, DNS pointing at 10.0.0.1:
One thing to know
This sets up an isolated internal network. Your VMs can talk to each other and to the host, but they can't reach the internet through this switch. For a homelab where you just need a DC and a client on the same subnet, that's fine. If you need internet access for the VMs, you'd either enable Internet Connection Sharing on the host's physical adapter or set up a NAT gateway with New-NetNat in PowerShell. Different topic, different post.
For now though, your VMs can see each other, DNS works, and you can move on to domain joining and group policies.